
Hey! Remember me? If not, that’s okay… it’s been a very long time since I posted (except to link to other much more crafty people).
I’m winding down from all the food, sugar and activities from this Easter. (Happy Easter!) I wanted to post about something I made that actually (1) turned out pretty cute and (2) was done in time! Even though I was finishing it up at 2am last night, it totally counts!
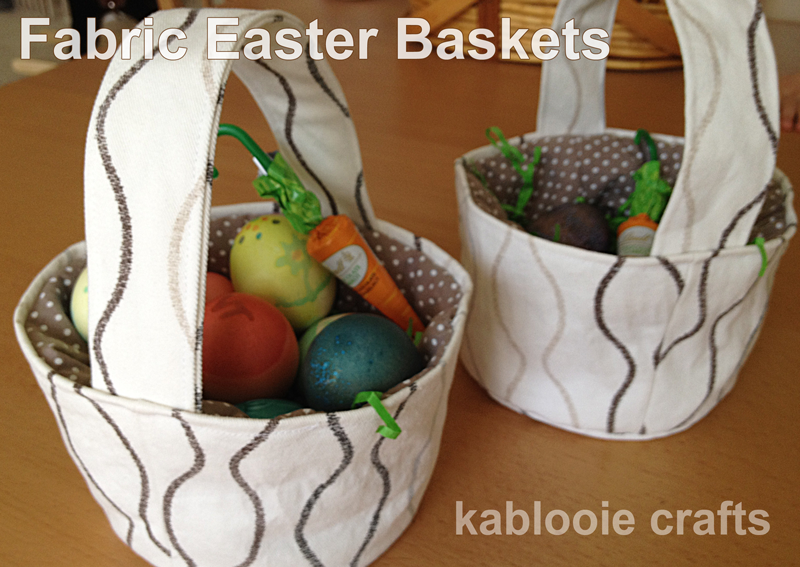
Last year, my boys had some cheap felt Easter baskets from Target. This year, I wanted to try and make something for them instead. I ended up with this:
Sorry, what follows isn’t detailed enough to be a tutorial, but hopefully my description is enough to follow if you want to make baskets of your own.
You may remember this fabric as the IKEA curtains from my tote bag post. I love it! It’s a great weight and the print is fabulous! The lining is a cute taupe cotton with white polka dots from Jo-Ann’s.
I started by using a pattern for a hat in order to get the sides and bottom of the basket. You can use any pattern that you have, or draw something from scratch.
Using the pattern for a hat, (yes, this bucket hat… lol…. size extra-small), I created a pattern using the crown and the sides only. But, I added 2 inches of height to the hat sides (2 inches seemed like a good estimate).
I also cut an extra side from some batting, for stability and because I wanted this basket to feel a little bit plush.
I sewed those pieces to create the basket outside, and the inside. I also created a handle, eyeballing for size…. about 12 inches long is perfect. Then, I put the lining and outer “cap” together, right sides together, with the handle sandwiched in between right at the seam.
This is where I realized the basket would be too tall for my liking (that 2 inch estimation would have worked out better at 1 or 1 1/2). This was easily solved by sewing the two “caps” together with a large seam allowance – 1 inch – to make the basket shorter. I left a small gap to turn right-side out.

I wanted the outer fabric to have a lip, so, after turning inside out, I shifted the seam about 1/4 inch into the basket. (Did that make sense?) I think this helped make the lining look nice and puffy, too, because it has to bunch up a little. That pretty much worked out by accident, but I’ll take it! I top-stitched it 1/4 inch all along the brim, to define and stabilize the lip. Then, I hand-stitched the gap closed, and it was complete!
All in all, I like how they turned out! They’re a little bit floppy, but I like that about them. You could put wire or heavier interfacing in them if you want to add more sturdiness. You can play with the handle length (the first basket is 2 inches longer) – making it longer made the handle floppier. I found 12 inches worked well.
My boys really like the baskets and have been toting things around in them all day (especially candy)!

Sorry that I didn’t finish these earlier to post them before Easter, but… well… this is just a really really early post for Easter 2013. Yeah, that’s it!