
Tutorial
Step: Make Your Stencils
Material:
Since it’s spaced at 1 inch intervals, I spaced my design in Silhouette designer to match, and the cuts ended up in the middle of the tape.
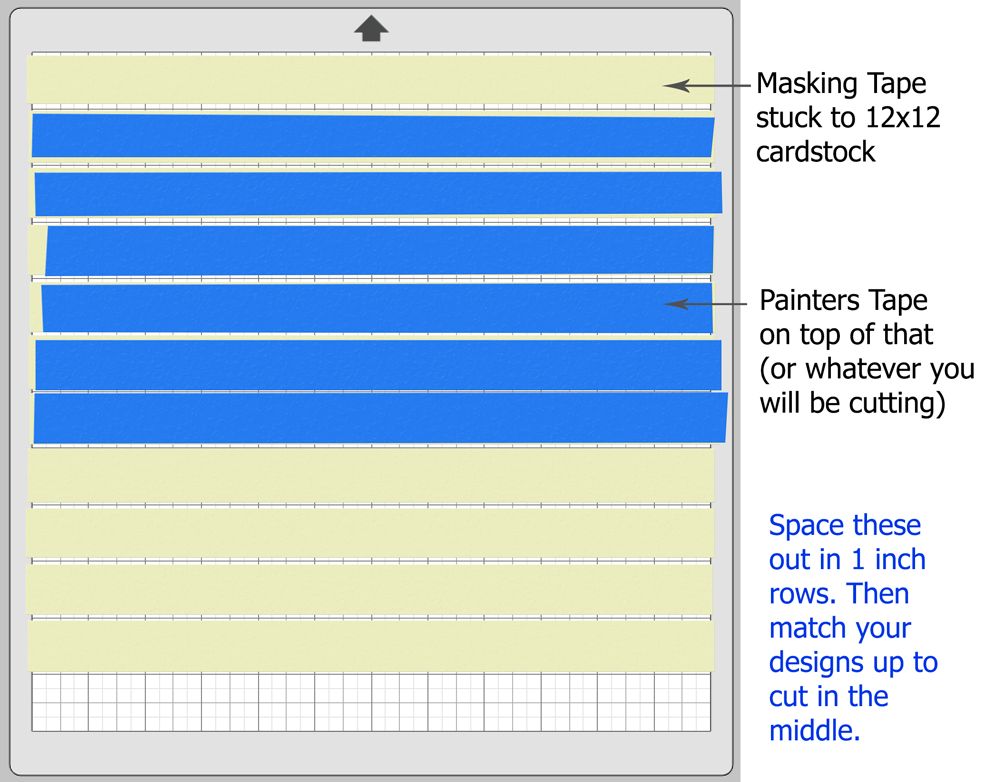


Add dividing lines between each “squiggle” if you are cutting this on a 12×12 sheet instead of strips of tape.
Cut out your design on painters tape or masking tape.
You might be tempted to use each half as a stencil, but the shapes should always be rounded, not pointy. The half that is rounded is going to be the half that you toss out.
A picture might explain that better:

Toss the yellow parts away, these are the areas you are exposing to the tan paint later. Keep the gray parts, these are the stencils. (See how they have the “pointy” parts?)
You can make enough of this stencil to go all the way around the case, or just make one section and reuse it over and over around the case. I did the latter.

Step: Exterior Paint
Begin by taking the hinges off of the case so that you have a separate door and case to work with.
Tape up the glass on the door to protect it from paint.
Tape up the case to cover the interior and hinges. (I stuffed plastic bags inside and then taped over that.)

Use some fine sandpaper to lightly sand the case. This will help your paint stick better. (I used a primer on mine, but that’s because I had to fix an earlier paint issue. You can prime too if you want. It’s up to you.)
You don’t have to follow this order, but here’s the order that I painted:
1 – Paint the entire case (not the door) in metallic black. Allow to completely dry.
2 – Place your border stencil all around the front of the case. Tape over the rest to protect it. Spray the border with the hammered bronze color and allow to completely dry.


3 – Spray the border of the door with the hammered bronze and allow that to dry. (The texture is so cool!)

4 – If you want to add in the panels and sheikah symbol details, continue. They are fairly subtle, but it does add a neat detail. Otherwise, skip to step 7.
5 – Using the blue painter’s tape, block out “panels” on the back. The spaces in between will be filled with the matte black paint to make the outline. Also, cover the back 1/2 inch all the way around, where the sheikah symbols will later go. And, cover your tan border so that it doesn’t get painted.
See below for how it turns out, to help illustrate how it should work (I did not take a picture of this step, but here’s the “after” photo. The blue tape covered the shiny black part.)

Spray the exposed areas with the black matte, and wait for it to dry.
6 – Using your sheikah symbols stencil, lightly spray the metallic black around the back border of the case. It’s ok to have spots that are faded and others that are not – it will make the texture more interesting. These will catch in the light, but they are not obvious. The metallic black has just enough shine to show against the matte black.
7 – Your spray painting is done (YAY!) Time to paint some details in that border, otherwise it looks really flat. I tried a few things until I was happy with this part.
- Using a medium/darker brown (the paint pen worked nicely here), freehand some squiggles onto the tan border. Allow to dry.
- Use the Hammered Bronze spray paint and spray some onto a plate/cup. Dip your foam brush into that and dab lightly over the squiggles, just enough to add the look of raised areas.
- Paint some highlights with the tan paint.
- Repeat until happy with the look.


Step: LED Lights
I drilled a hole in the bottom at the back, to allow the wiring to pass into the case. There’s a groove where the baseball bat insert was supposed to go, so it’s perfect to line your wires up inside of that.
I used black duct tape to hold the wiring in place inside the case. Then, I ran the LED strip along the interior, near the front but not flush to it. You want it back a little ways to be able to see the strip, but not so far back that it gets in the way of the amiibos, or they won’t stand flush.
As mentioned in the first part, I needed to use a stronger adhesive tape to attach the strip, otherwise it fell off.
This next part is tedious, but the results are well worth it! You’ll need to cut out a mask for the lights using black vinyl. You’re going to be cutting out strips of sheikah symbols, with occasional spaces between the symbols, and you’ll want the strips to be slightly wider than the vinyl so that it can wrap over it and block out any side light.
In Silhouette Designer, mine looked like this:
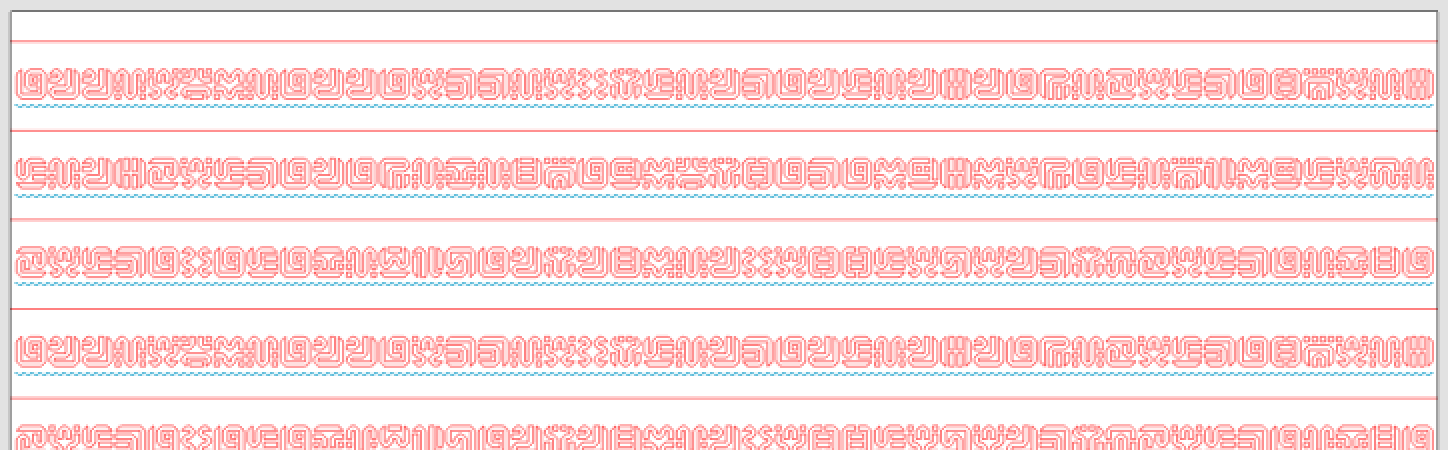
(see previous post for sample download)
Cut your strips, and weed out each tiny little piece. Tweezers helped sometimes and that little weeding hook as well.
Carefully align and adhere the vinyl over the LED strip as you go.

Step: Orange Symbols
This part is fairly easy and quick. Cut out the orange glow-in-the-dark tape, making some long thin strips and some circles. The tape circles should be slightly smaller than the rust colored circles on your wood circles, so that you see the rust color, but only a little. (See picture for a guide.)
If you have a large wood circle, use a hot glue gun to attach a smaller wood circle to it.
Stick the orange tape circles to the wood circles. Again, you don’t need to be exact in your placement here.
Use a hot glue gun to attach the wood circles to the case. Whatever pattern you choose – it’s up to you and there’s no “wrong” way here. It can help to find a game screenshot and try to match a pattern you see there. I put them on the 2 sides only.
Cut the orange tape strips to match the distance between the wood circles and stick. (Here’s where I might go back and touch the strips up later, to add some tan paint to the edges where they touch the circles.)


I’m going to stop saying circle now.
The tape I got doesn’t glow for super long, but, it GLOWS and that’s cool!

Final Step
Re-attach the glass door to the case.
Put in your amiibos (or whatever this case will be holding)!
Sit back and enjoy!
