I finally tackled making a blanket! *woohoo!*
I’m not sure why quilts and blankets have intimidated me for so long — not that intricate quilts still don’t — but for how much I’ve read tutorials on them, I kept putting off trying to make one myself.
Rag quilts are sort of a beginner’s quilting project, so when a friend of mine told me she was having a little girl, I REALLY wanted to make a gift that was more useful, and more of a keepsake, than what I’ve created so far. I followed this tutorial from Do It Yourself Divas, because it’s awesome.
Follow that tutorial if you want to make one… I’m showing some pics along the way but not in that much detail.
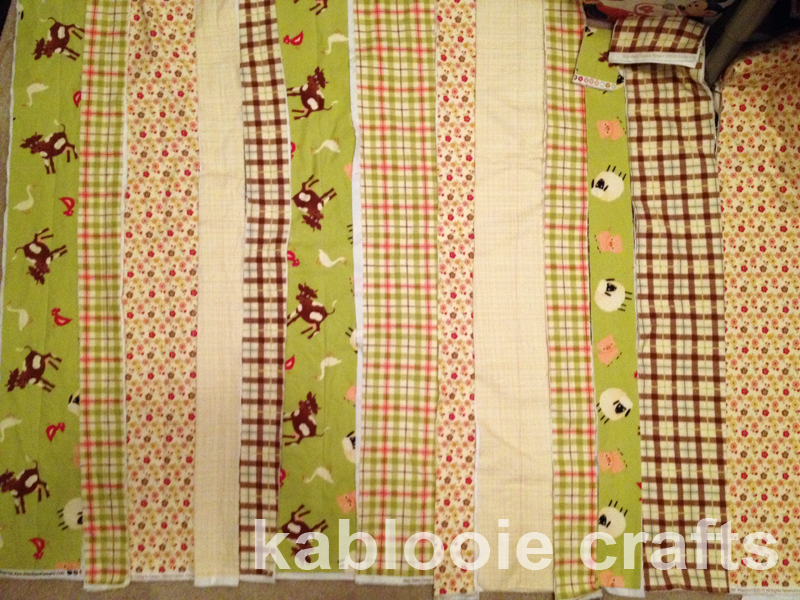
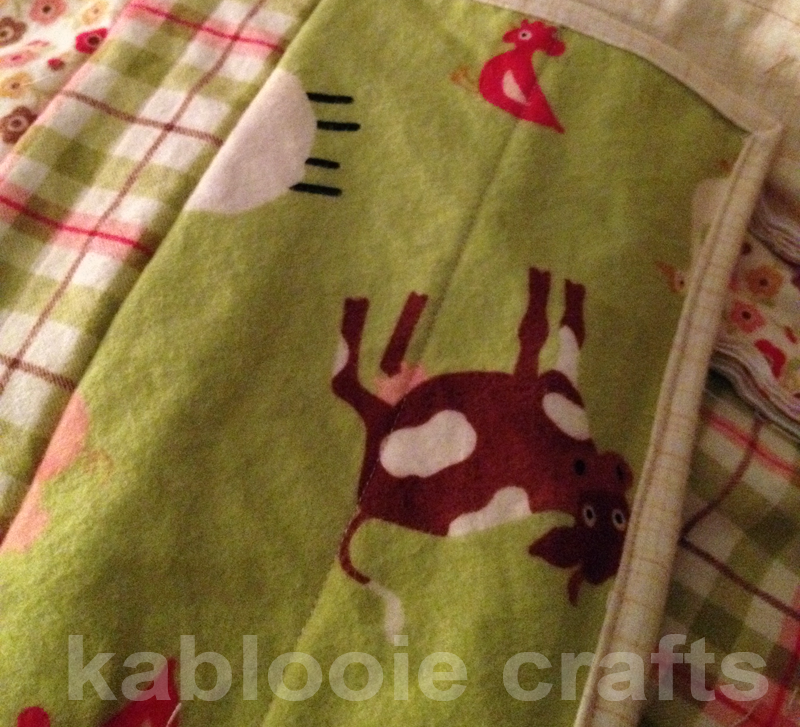
I had this great collection of Riley Blake fabric called “Farm Fresh.” It’s awesome because it’s girly, but not princess-ey… I can only imagine the princess stuff gets a little old. This flannel is super soft. You don’t have to use a collection, you can totally pick your own styles, but it was rather nice having everything just *work* together so well.
To me, the most frustrating part is the first step: Cut a bunch of really long strips. Then cut some more. Then some more and while you’re at it, how about some more? Yawn. It’s hard to envison a cute quilt at this stage. Plus, I’m not good at keeping my lines precise when it’s a very big piece of fabric… so I had to correct a few that went off. 🙂
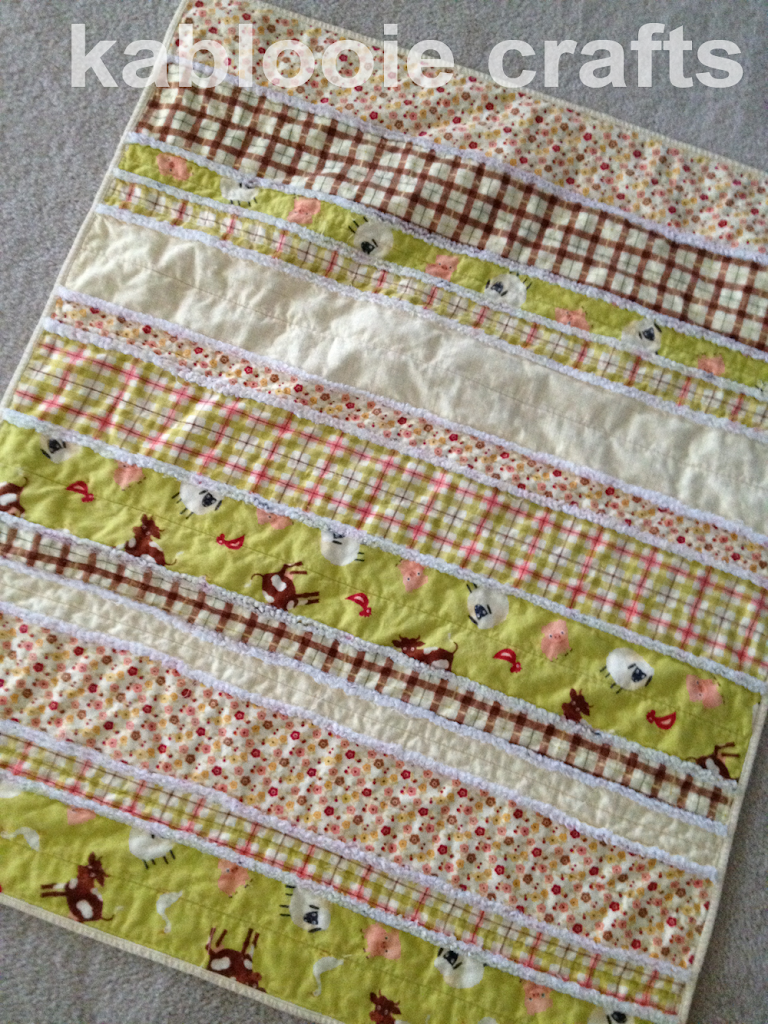
Finally when you’re done with that, and you’ve sewn the strip fronts and backs together, you can lay out the design for your quilt. Then it starts looking like an actual something!
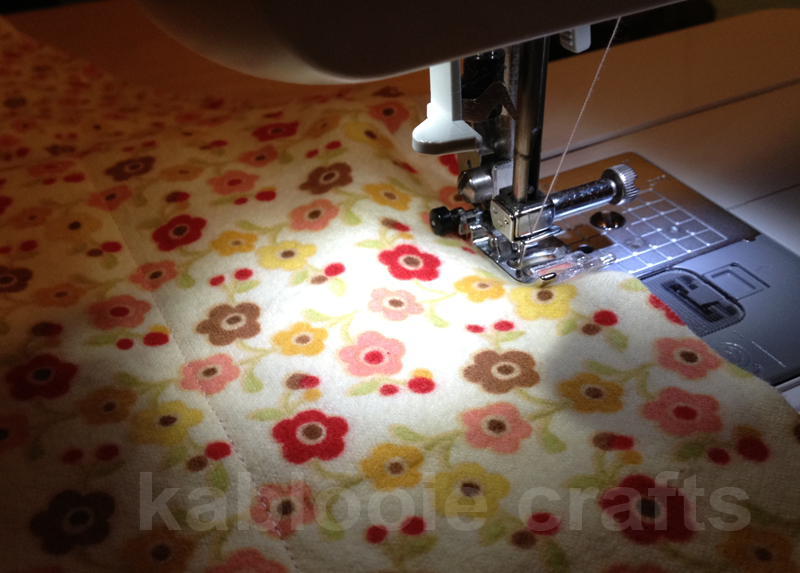
Sew those strips together…
 |
| (Yep, I left the selvedge on by accident… no problem though, just trimmed it all off after all the strips were sewn together, and evened out the edges.) |
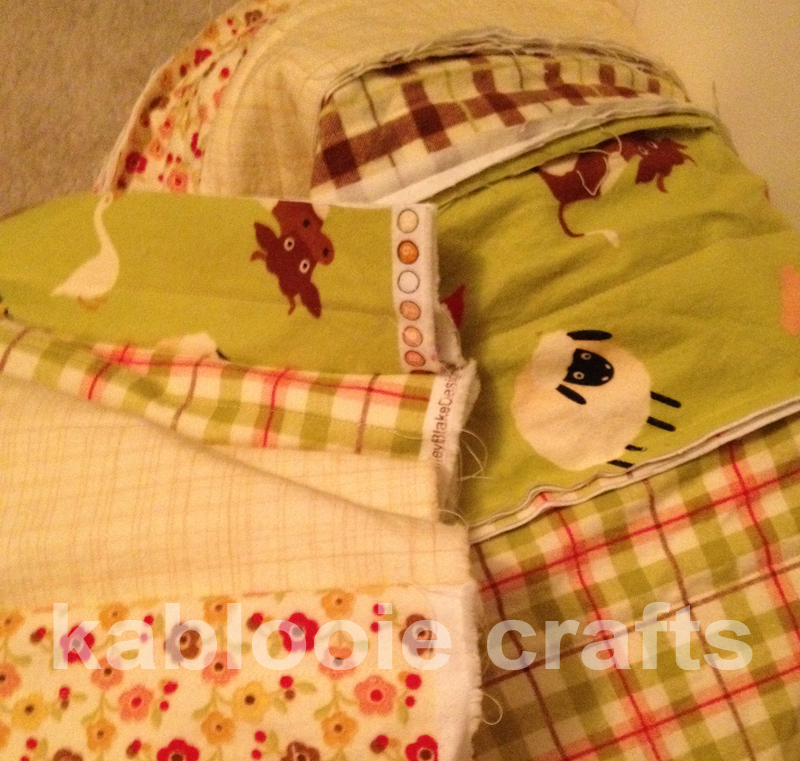
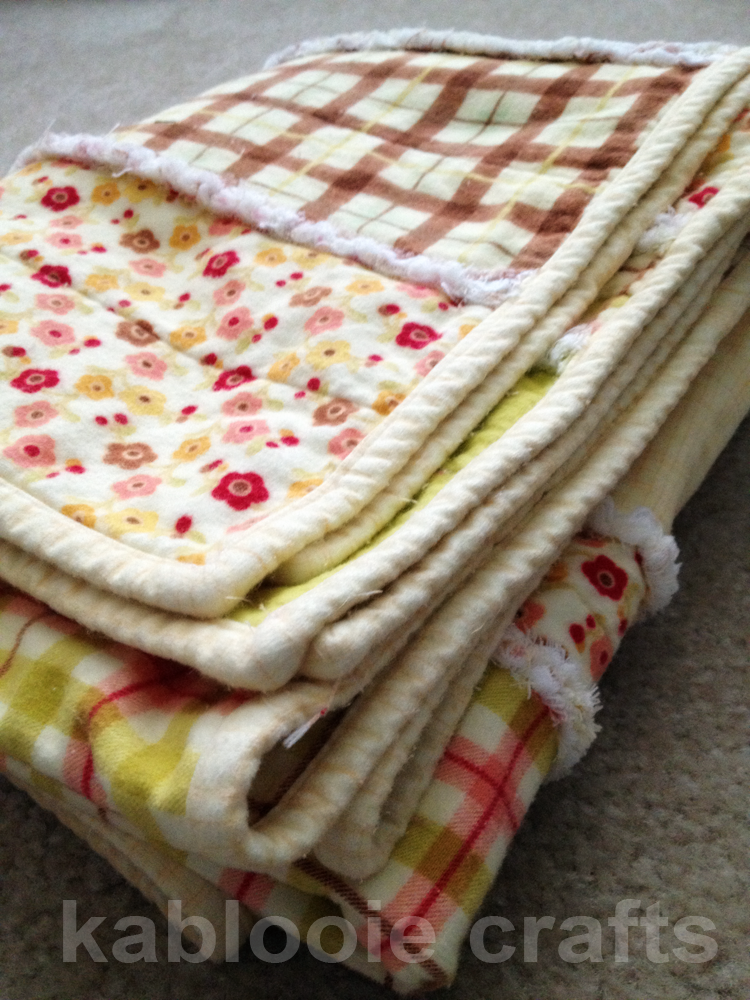
And then sew on a binding. I did this all with a sewing machine… hand sewing probably looks nicer but I have NO patience for that. For my first time binding, I’m really happy with how it turned out! I used this tutorial from Make It and Love It to do the binding. (LOVE her quilts!)
And then you cut little bits along the edges… and cut… and cut…. Having spring-loaded scissors really does help here, but my fabric was so thick that I had to cut it in 2 parts. This is where you’ll want to watch TV or a movie.
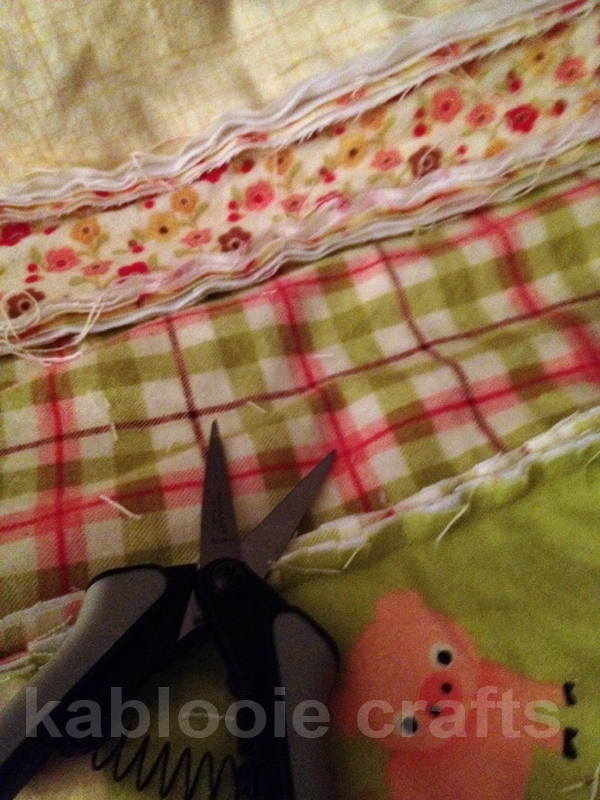
Finally, put it in the washing machine a few times! Snip off the frayed threads between washings. They’ll fluff up and be super soft.
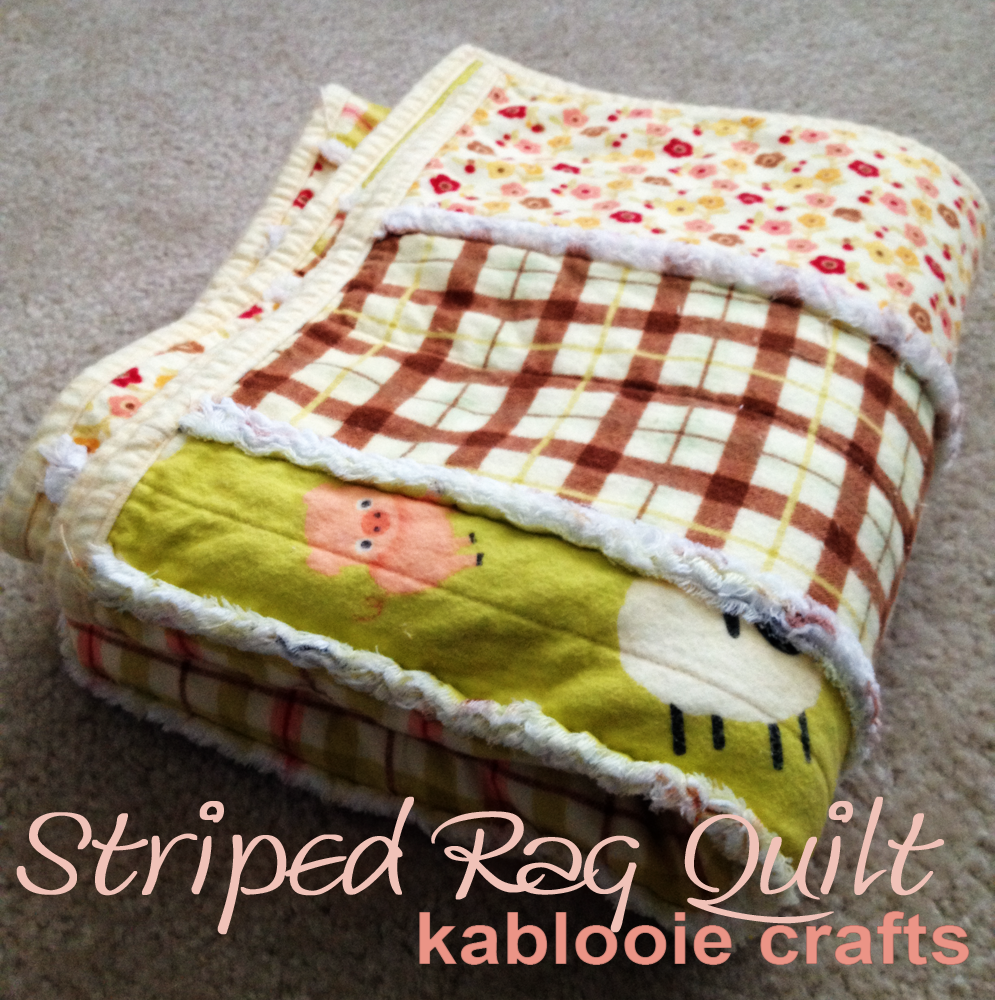
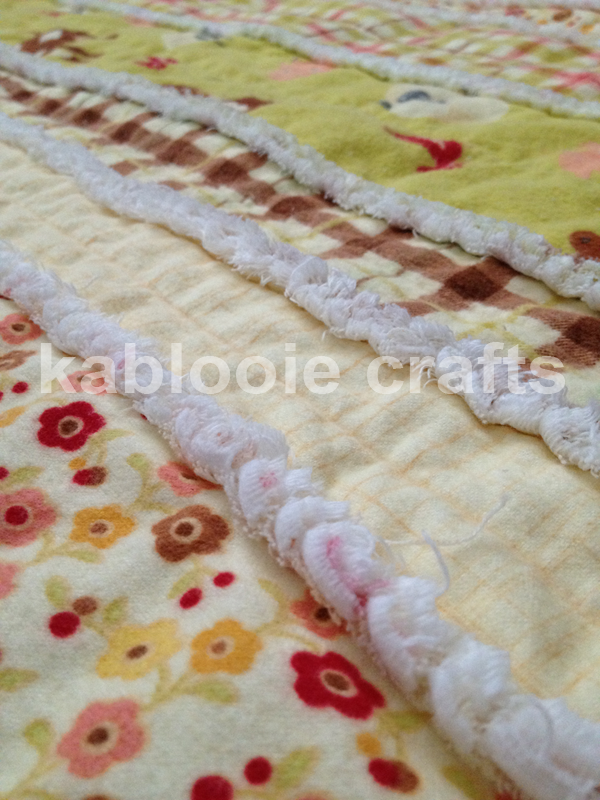
The finished quilt! One side is smooth, the other has the frayed edges. It has a good weight to it, and is super soft and snuggly.
 |
|
A close-up of the frayed side. I can see a thread I missed! LOL
|
I’m so happy that it turned out! I want to make more of these, definitely, but need a little break for the moment (they are very time consuming).
More baby stuff coming soon… lots of babies around here lately! 🙂
LOVE!!!
Your quilt is ADORABLE. I found it by reading thru the posts on the original http://www.doityourselfdivas.com site. I'm so glad you included the link info because truly I love your fabric selections. Thank you for sharing. In your directions you said to wash it multiple times, did you dry it as well each time? I also noticed you chose 5 fabrics rather than the original pattern says choose 7 fabrics, am I missing something? I truly LOVE yours!!
Hi Judy, and thanks so much for your comment!! You're so nice! I'm so glad you found my post. I really loved how cute this blanket turned out! I did dry it between washings, so that I could get an idea of how frayed it was and whether I wanted to wash it again. Also, the dryer catches a LOT of the fuzz. I didn't have 7 fabrics that matched, so I just repeated a few stripes with the fabrics that I did have. I think you can sort of improvise when it comes to that. More stripes = longer quilt. 🙂 Good luck, if you make one please let me know!